
The Raspberry Pi 5 packs a lot of power into a small board, but microSD cards still hold it back when it comes to speed and reliability.
The good news is that the Pi 5 gives you more flexibility than ever. It has two USB 3.0 ports that support fast data transfer, and it also includes a PCIe expansion interface. Therefore, you can add external drive for Raspberry Pi setups.
These external drives offer not only higher data transfer rates but also greater capacity and durability. This makes them ideal for hosting large media libraries, performing backups, and even running the operating system itself.
In this guide, we’ll walk you through how to add external drive for raspberry PI to use, covering everything from recommended drive types to setup, mounting, and optimization.
Recommended Drive Types and File Systems
When we refer to add external drive for Raspberry Pi, we mean any storage device that connects to the Pi from the outside, typically through a USB port.
This includes USB flash drives, portable hard drives, solid-state drives, and even bare internal drives connected with USB-to-SATA cables.
External drives are a great upgrade from microSD cards because they offer:
- Faster read and write speeds
- More storage capacity
- Better long-term durability
Here are the most common types of external drives that work well with the Raspberry Pi 5:
2.5″ SATA SSD (USB 3.0 enclosure)

This is one of the best options if you’re looking for speed and reliability. A 2.5″ SATA SSD inside a USB 3.0 enclosure can deliver several hundred megabytes per second, far faster than a typical microSD card.
- Pros: High performance, silent operation, low power consumption, durable
- Cons: More expensive per GB than HDDs
- Best for: Running the OS, applications, Plex/media libraries, general-purpose storage
2. Portable HDD (USB 3.0)
These are pre-built external hard drives, often available in capacities from 500 GB to several terabytes. They’re slower than SSDs but cost-effective for large backups or media collections.
- Pros: High capacity, cheaper per GB
- Cons: Slower speeds (~100 MB/s), moving parts, more power-hungry
- Best for: File backups, archival storage, large media files
If you’re using a 3.5″ external HDD or a power-hungry 2.5″ model, pair it with a FlywingTech 4-Port Powered USB 3.0 Hub to avoid undervoltage issues.
M.2 NVMe SSD (USB 3.1 Gen2 enclosure or PCIe expansion board)

The Raspberry Pi 5 supports a PCIe Gen3 ×1 interface, which can be used with M.2 NVMe SSDs for extremely fast data access. You’ll need either a PCIe expansion HAT or a USB 3.1 Gen2 NVMe enclosure to set this up.
- Pros: Very fast (up to 1 GB/s), ideal for high-demand applications
- Cons: More expensive, more complex to install
- Best for: Servers, databases, fast system drives
File System (Format)
Before using your external drive, it’s important to format it with the right file system. Here’s what to consider:
| File System | Best For | Notes |
| ext4 | Raspberry Pi only | Native to Linux. Fast, reliable, no extra setup needed. Recommended. |
| NTFS | Sharing with Windows systems | Slower on Linux, requires ntfs-3g driver. Use only if needed. |
| exFAT | Sharing with Windows/macOS | Compatible and supports large files. Install exfat-fuse and exfat-utils. |
| FAT32 | Maximum compatibility | Works everywhere, but limited to 4 GB file size. Not ideal for media. |
Connecting the Drive
Setting up your external drive on the Raspberry Pi 5 is simple, but there are a few key considerations to keep in mind, particularly regarding power and ports.
- Power off your Pi (optional): You can plug the USB drive in while the Pi is running, but it’s safer to power down first.
- Plug into USB 3.0: Insert the drive’s USB cable into one of the Pi 5’s USB 3.0 ports (identified by the blue colour). These ports support the full 5 Gb/s speed.
- Power for the drive: If using a high-power drive (such as a 3.5″ HDD or an unpowered 2.5″ HDD/SSD), ensure it has its 5V power supply. Note that excessive power draw typically causes brownouts or disconnection. In practice, use a powered USB hub (e.g., FlywingTech 4-Port Hub) to ensure the drive receives sufficient current.
- Boot up the Pi: Turn on your Raspberry Pi 5. The drive should spin up and be detected by the system.
Always use high-quality USB 3 cables and a reliable power adapter from Flywing tech to prevent intermittent disconnections.
Identifying the Drive in the System
Once the Pi is running with the drive connected, check that Linux sees it.
Open a terminal and:
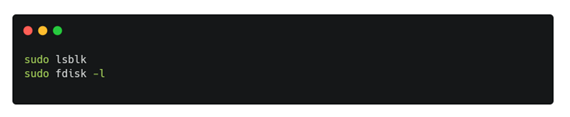
These commands list block devices. Look for a new entry like /dev/sda1, /dev/sdb1, etc. (If the Pi’s microSD is /dev/mmcblk0, USB drives usually become /dev/sda, /dev/sdb, etc.)
You can also use sudo blkid to show device UUIDs and labels.
For example:
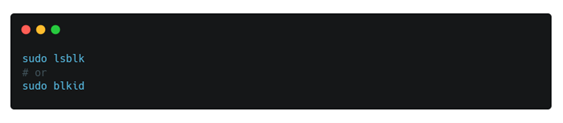
The output will include your external drive’s size and format. Note the device name (e.g. /dev/sda1).
If you plugged in multiple drives, identify them by size or label. Make sure to use the correct device when mounting to avoid data loss.
Mounting the Drive Manually
To use the drive, you need to mount its filesystem to a folder. First, create a mount point, e.g.:

Replace mydrive with any name. Then mount the partition (using the device you found above):

This command attaches /dev/sda1 at /mnt/mydrive). After mounting, list the directory to verify:

You should see the files on your drive. If you encounter a permission error or see nothing, double-check the device name and ensure the drive is formatted in a recognised file system.
Setting Up Automatic Mount at Boot (fstab)
To have the drive mount automatically on every boot, add it to /etc/fstab. It’s best to use the drive’s UUID (so it doesn’t change if the device name shifts). Find the UUID with:

Copy the UUID string (e.g. 1234-ABCD). Then edit the fstab file:

Add a line like this at the end, replacing values as appropriate:

- Replace 1234-ABCD with your partition’s UUID.
- Replace /mnt/mydrive with your mount point.
- Replace ext4 with the actual filesystem (e.g. ntfs or exfat if not ext4).
- The options defaults,nofail mean “mount normally but don’t halt on boot if missing”raspberrypi-guide.github.io.
- The final numbers (0 2) are dump/fsck options for ext4 (use 0 0 if unsure).
For example, the Raspberry Pi Guide shows:

After saving fstab, test it with:

This should mount all fstab entries. If no errors occur, reboot the Pi to confirm the drive comes up on boot.
Configuring User Permissions
By default, a mounted drive is owned by the root user. To allow the default “pi” user to write to it, change the ownership or permissions.
For example:

This makes pi the owner of the mount directory. You can now write files there without sudo. (If you used a Windows filesystem, you could also add uid=1000,gid=1000 to the fstab options to have Linux automatically set the owner.)
After adjusting permissions, try creating a file:

If this succeeds under your user account, permissions are set correctly.
Using the Drive for Media, Sharing, or Backups
Once your external drive is mounted and writable, you can use it just like any other folder on your Raspberry Pi.
Whether you’re storing media, sharing files over the network, or backing up important data, having that extra space makes your setup a lot more flexible.
Media storage
Copy your movies, music, or photo libraries to the drive and point your media apps to it. Tools like Plex, Kodi, or Jellyfin can scan and stream content directly from /mnt/mydrive.
This is especially useful if you’re building a home media center with your Pi. The faster read speeds from an SSD also mean smoother streaming and quicker loading times.
Network file sharing
You can share the drive across your local network using Samba, a file-sharing tool that makes your Raspberry Pi look like a Windows file server. To get started, run:

Then edit the Samba config file:

Add a simple share block for /mnt/mydrive, restart the Samba service, and now other computers on the same network can access your Pi’s external drive just like a shared folder. It’s a handy way to create a basic NAS.
Backups and storage
Use the drive as a reliable backup location for your Raspberry Pi’s files or even the entire SD card. A simple command like this copies your home directory to the drive:

You can even schedule this with a cron job to automate daily or weekly backups. If you’re using tools like Raspberry Pi Imager or other backup scripts, just point the output to your external drive.
Any app or script that saves files can use /mnt/mydrive as its storage path. That includes databases, logs, camera footage, download folders, and anything else that requires additional storage space.
Troubleshooting Tips
If your external drive isn’t working as expected, these checks can help you sort things out quickly.
Drive not detected
After plugging in the drive, open a terminal and run:

This shows the latest system logs. You should see something like “new USB device found” or a reference to your drive.
If nothing shows up, try a different USB port or cable. Older USB 2.0 drives should still work when plugged into a USB 3.0 port, just at slower speeds.
Power issues
If your Pi displays undervoltage warnings or the drive keeps disconnecting, it’s usually a power-related issue. Ensure you’re using a high-quality power supply that provides at least 5V and 5A.
The FlywingTech 5.1 V / 5 A USB-C power adapter is designed for this exact need. For drives that draw a significant amount of current such as 3.5″ HDDs or older 2.5″ drives without their own power supply use a powered USB hub.
Slow USB speeds
Make sure the drive is connected to one of the Pi 5’s USB 3.0 ports (the blue ones). To confirm it’s running at full speed, you can check:

or browse:

Some enclosures are limited to USB 3.0 (5 Gbps), not USB 3.1 Gen2 (10 Gbps). That’s fine for the Pi 5, which maxes out at 5 Gbps per port.
Filesystem compatibility
If a drive formatted on Windows (NTFS or exFAT) doesn’t mount, you may need to install extra drivers:

Once installed, try mounting again. If you plan to use the drive only on the Raspberry Pi, reformatting it to ext4 is recommended for speed and compatibility:

fstab errors on boot
If the Pi hangs at startup because it can’t find the drive, it’s usually a mistake in your /etc/fstab file. Edit the line that mounts the drive and add nofail so the system skips it if the drive isn’t connected.

You can also run to test your fstab setup before rebooting.
Permissions and ownership
If you can’t write to the drive from your regular user account, it’s probably a permissions issue. Make sure the mount point is owned by the pi user:

If you’re mounting NTFS or exFAT drives, adding’ uid=1000, gid=1000′ to the fstab options also helps grant the correct access.
Safe removal
Always unmount the drive before unplugging it:

This avoids data loss and keeps your filesystem clean.
Final Thoughts
By following these steps, you can confidently set up and use an external USB drive on your Raspberry Pi 5.
Whether you’re expanding your storage for media, sharing files across your network, or backing up important data, a USB 3.0 drive offers more space and improved performance compared to a microSD card.
And when you pair it with reliable accessories like FlywingTech SSD enclosures, powered USB hubs, and 5.1 V USB-C adapters, you get a setup that runs smoothly from day one.
Frequently Asked Questions (FAQ)
1. Can I use any external USB drive with Raspberry Pi 5?
Yes, Raspberry Pi 5 supports most USB external drives including flash drives, portable HDDs, SSDs, and even M.2 NVMe drives with the right adapter. Just make sure the drive is properly powered and formatted.
2. What’s the best type of external drive for Raspberry Pi 5?
For performance and reliability, a 2.5″ SATA SSD in a USB 3.0 enclosure is ideal. It’s faster and more durable than HDDs, though slightly more expensive. If you need high capacity on a budget, a portable USB HDD works well too.
3. How do I add external drive for Raspberry Pi and make it usable?
Connect the drive to a USB 3.0 port, ensure it’s powered properly, then mount it using terminal commands or let Raspberry Pi OS mount it automatically. You can also edit the /etc/fstab file to mount it at every boot.
4. Does Raspberry Pi 5 support booting from an external SSD?
Yes. Raspberry Pi 5 supports USB boot. You can flash Raspberry Pi OS directly to an external SSD and boot from it, offering much better speed than a microSD card.
5. How should I format my external drive for Raspberry Pi?
-
Use ext4 if the drive is only for Raspberry Pi (recommended).
-
Use exFAT or NTFS if you need cross-platform compatibility with Windows/macOS, but install the necessary Linux drivers (
exfat-fuse,ntfs-3g).
6. Why is my external drive not detected by the Raspberry Pi?
Check with dmesg | tail in the terminal. Try a different USB port or cable. Also, make sure the drive is powered—some drives need more current than the Pi can supply directly.
7. How do I share my external drive over the network?
You can set up Samba on your Pi to make the drive accessible across your local network. It’s great for turning your Pi into a mini NAS.
8. Can I use the external drive for backups?
Absolutely. Tools like rsync, cron, or even Raspberry Pi Imager can be configured to back up your system or personal files to the external drive.
9. How do I safely remove an external drive from Raspberry Pi?
Always unmount the drive first using:
Unplugging without unmounting can lead to file system corruption.